The Vuse ePod 2 is a powerful device and a vaping device that continues to strive for innovation.
Even if you own it one day, can you be sure to say that you will use it? So, Vuse ePod 2 how to use?
That’s okay. Our Vape Pen Zone team is happy to provide you with a detailed user guide below for the best vape pod experience.
The guide will focus on four main areas that will allow you to understand it fully.
- Vaping
- Charging
- Pod installation and replacement
- Turn on the device
Not only that, the article will further mention how to charge and fill it with vape juice. For more additional effective information, you are invited to continue reading!
Introduction

The latest addition to the Vuse line of vaping devices, the Vuse ePod2, has been a hit with many users thanks to its sleek, compact design and easy-to-use pod system.
However, as technology improves, so do the functions of the ePod 2 device.
As a result, it may be difficult for many newcomers who are using this device for the first time.
So, to put together a comprehensive guide on how to use it, we hired four professionals with ten years of experience in vaping.
Then, we had each of them conduct a month-long test and research on vaping, charging, installing and replacing pods, and opening the device.
So, what were the fruits of the experts’ labour that they spent a month getting? Don’t worry. You’ll soon know the answer by reading the following user guide.
EPod 2 Vape Structure
The Vuse ePod 2 is a closed pod system vape that provides users with a convenient vape experience.
Although the functions of the Vuse ePod2 device are constantly being upgraded, its overall structure is still very simple. It is mainly made up of the following 5 components:
- Mouthpiece: inhales the vapour
- Prefilled Pod: stores vape juice
- Heating system: ceramic coil heats the e-liquid to produce vapour
- LED indicator: detects the battery level
- Battery: provides power to support the operation of the device
For a more intuitive understanding of the device’s internal structure, you are welcome to browse our attached structural diagram!

Vuse EPod 2 How To Use?

After learning about the ePod 2‘s inner structure, let’s explore all aspects of its use!
➀ Vaping
This vaping device uses a drawing activation feature that is very easy for newcomers to use. It does not have any pushable buttons on its surface.
All you need to do is inhale into the mouthpiece.

When the heating element is successfully activated and produces vapour, the LED light on the front of the device flashes white.
When the vaping is over, the light will also go off.
However, please position the pod inside your mouth rather than against your lips for your best enjoyment.
➁ Charging

The device has a charging port and can be charged with the magnetic charging cable included.
Please see the following steps for the exact charging procedure:
- Plug the included magnetic charging cable into the charging port at the bottom of the device.
- Connect the other end of the magnetic charging cable to a power source. (computer’s USB port or Vuse wall charger)
- When successfully connected to a power source, the LED on the device will blink white.
- Wait for the device to charge for 30-60 minutes, taking care not to leave the device unattended.
- Unplug the charger when the white LED goes out, and start enjoying your delicious vape flavours!
➂ Pod installation and replacement
The Vuse ePod2 device is compatible with the Vuse ePod. Currently, the Vuse ePod refill is available in a whopping 19 delicious e liquid flavours!
➡️ Pod Installation

- Remove the pod from the package and remove the silicone plug at the e-liquid fill port.
- Insert the pod vertically into the ePod 2 device. The magnet will pull the pod into place.
➡️ Pod Replacement

- Pull the pod right out of the device and discard it.
- Just re-insert the new pod following the installation method mentioned above.
➃ Turn on the device
How to turn on the ePod 2 Vuse? The ePod 2 is not designed to be opened, so if you perform the following actions, you do so at your own risk of damaging the device.
- Gently pull the pod out of the device and set it aside.
- Hold the lid on the bottom of the device with the pliers and rock it from side to side.
- Once you see the grooves, pull out the cover firmly with the pliers’ tip.
- Check the condition of the battery and coil and replace any damaged parts.
- Reinstall the device, putting all components back in their original positions.


Vuse EPod 2 Manual – Charging Instructions

The Vuse ePod2 is a pod vape with a charging port and supports charging it with the included magnetic charging cable.
However, for those new to this rechargeable pod vape, it can be confusing to determine when it’s fully charged and how long it takes to charge.
Therefore, so that you can use and buy this device with peace of mind, we have compiled a few frequently asked questions from users and provided sincere answers.
1. How to know when Vuse ePod 2 is fully charged?

While charging, the LED light emits different signals to show its current level of power.
When the white LED light goes off, it means that the ePod 2 is fully charged and can be disconnected.
However, what does the white LED light blinking continuously mean?
To learn more about the ePod 2 Vape indicator lights, please visit the table below:
| Indicator Light Signal | Reflected Issues | Solutions |
|---|---|---|
| Constant white light when charging | Device power at 80% -100% | Wait for the device to charge to 100% |
| White light flashes when charging | Device power below 80% | Wait 30-60 minutes for charging |
| White light goes out when charging | The device is fully charged | Disconnect the charging cable |
| White LED light blinks 10 times | The device is in low battery mode | Charge your devices |
| White LED light blinks three times | 1. Vaping for more than 5 seconds 2. Short-circuiting of the device | 1. Limit the time of each puff to 2-3 seconds 2. Throw away the short-circuited device and buy a new one |
2. Vuse ePod 2 charging time

The Vuse ePod 2 kit has a fast charging feature, capable of charging from 0% to 80% in 35 minutes.
Typically, a 350mAh capacity battery will only take 30 minutes to an hour to fully charge.
At this point, the device’s battery life can last up to a full day, making enjoying an uninterrupted vaping experience throughout the day a non-issue.
3. Vuse ePod 2 not charging: how to fix it?
The problem of ePod 2 not charging is mainly caused by the following factors:

✅ Internal factors
- Battery damage: replace the battery within the warranty period or purchase a new device.
- Faulty device: contact customer support for further assistance or request a refund within the validity period.
✅ External factors
- Loose charging cable connection: check that the charging cable is securely connected to the device and the power supply.
- Using a charger that is not compatible with the device: to charge the device, use the supplied magnetic charging cable and a compatible charger.
- Charging port blocked: stick a cotton swab into the charging port to remove debris.
- Faulty power supply: replace the power supply or try plugging in another device to verify that the power supply is working properly.
How To Refill A Vuse EPod 2?

The Vuse ePod 2 Vape is a pod vape that can be replaced with the whole pod directly, eliminating the need to fill your vape juice.
But to help some of you who prefer to fill your vape juice using the DIY method, we have provided a quick guide here.
1. Gather and prepare filling tools. (pliers, paper towels or cotton swabs, vape juice)
2. Gently pull the Vuse ePod 2 refill out of the device.

3. Clamp the pod base on one side with the pliers and twist from side to side.
4. Before filling with vape juice, use the pliers to clip out the gasket inside the pod and set it aside.

5. Reach into the pod with a paper towel or cotton swab and wipe away any residual water or e-liquid.
6. Align the tip of the bottle with the filler hole and slowly fill it with vape juice.

7. Place the gasket back into the pod and seal the pod again with the white metal base.
8. Allow the Vuse pod to sit for 10 minutes and then re-insert it into the device.

However, since a DIY refill will most likely void the warranty or damage the device, do so at your own risk.
Vuse EPod 2 Price List
The Vuse ePod2 is both rechargeable and a direct replacement for a pod, making it a perfect vaping device.
If you’re still on the fence, take a look at the ePod 2 prices we’ve gathered from Google’s top 10 online vape shops in New Zealand:
| Vape Shop | Price For ePod 2 Device | Price For ePod 2 Starter Kit |
|---|---|---|
| Vuse NZ | $9.99 | $14.99 |
| podlyfe.co.nz | $9.99 | × |
| Vapeys NZ | $9.99 | $14.99 |
| Mixology Vape | $9.99 | $14.99 |
| Xvape NZ | $9.99 | $14.99 |
| The Vaping Kiwi | $7.90 | × |
| Cloud Machine NZ | $9.99 | $14.99 |
| vapenation.co.nz | $9.99 | × |
| Urban Vape | $10.00 | $15.00 |
| vapecloud.co.nz | $9.99 | $14.99 |
Overall, the price of the Vuse ePod 2 pods has mostly stayed the same. On average, a single device costs $9.99, and a starter kit costs $14.99.
However, where can I buy a Vuse ePod 2 Vape? Vape Shop Online NZ is a reliable option if you want to ensure you purchase an authentic product.
Additionally, VapePenZone offers a 30-day hassle-free money-back guarantee and 1-year warranty service support for everyone to enjoy!
Safety Tips On Using EPod 2 Vape

To use the pod vape safely, it is important that you do not engage in any of the following behaviours:
- Continuous vaping and long vaping time: Accelerated e-liquid consumption.
- Using the device while charging: The battery is hot and causes damage.
- Vape on your side or lying down: Accidental ingestion of e-liquid.
- Place the device upside down: E-liquid leakage.
Verdict
After reading this guide, have you gained a more comprehensive understanding of how to use the Vuse ePod 2?
As the saying goes, practice makes perfect, and you can’t fully master anything until you try it yourself. So strike while the iron is hot and get one from the VapePenZone NZ online shop or Vuse Japan!
FAQ About Vuse EPod 2 How To Use
What does the button on the VUSE ePod 2+ do?
This button is primarily used for Bluetooth pairing, locking, or unlocking the device.
Lock the Vuse ePod 2+ with three quick button presses or via the MyVuseApp.
How do you know when Vuse ePod 2 is charged?
When the ePod 2 Vape is successfully connected to a power source, the white LED light on the device blinks. When the device is fully charged, the white LED goes off.
Why is my Vuse ePod 2 flashing white?
The ePod 2 device flashes white light in the following main ways:
1. The device is charging.
2. The battery is in low-power mode.
3. Vaping time exceeds 5 seconds.
4. The device is short-circuited.
How do I activate my Vuse pod?
The Vuse vape uses a vaping activation feature. This means that to activate the device successfully, we only need to inhale into the mouthpiece.
What is Vuse ePod 2 plus?
This device is an upgraded version of the ePod 2. To enhance your vape experience, it also adds Bluetooth connectivity, fast charging, and access to the Vuse app.
Additionally, this pod vape features built-in silent vaping technology and vaping activation, making it very easy for newcomers to use.
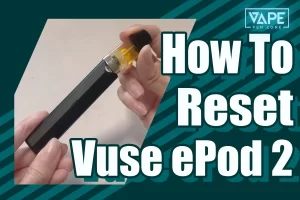
How to open Vuse Epod 2?
Follow these steps to open ePod 2 successfully:
1. Pull the pod out of the device.
2. Hold the cover at the bottom of the device with pliers and pull it left and right.
3. Once you see the groove, remove the battery and coil with the tip of the pliers.
4. Check for damaged components and e-liquid leaks.
5. Reassemble the device.