Have you ever seen the Vuse Go charging warning light while vaping but had no idea what it means?
Here’s the ultimate guide from Vape Pen Zone‘s testing of 76 Vuse Go vapes, detailing how to charge Vuse Go, covering almost all Go vape models!
The rechargeable Go Vape Reload and Go Vape 3000, 5000 and 8000 share a similar charging method with a Type-C charging port. Here are 4 steps to quick charge them:
- Clean blockage in the charging port at the bottom of the device
- Plug the USB-C charger into the charging port and the power supply
- Switch on the power and monitor the charging signals
- Plug out the USB-C charger from the charging port and power supply
Want more tips for optimal battery performance or a charging guide for disposable vapes? Read on to reveal the exclusive secrets!
Introduction
The Vuse Go vape is famous for its diverse range of vapes with different capacities and functions. Their rechargeable ones vary greatly in charging signals and methods.
The Vuse Go 500, 700, 800 and Go Max (1500) are all disposable vapes, while the Vuse Go Reload, 3000, 5000, and 8000 are rechargeable vapes.
VapePenZone have successfully charged the latter 4 vapes and recorded the process to help all Go vapers quickly resolve charging problems.
By the way, we offer a DIY charging guide for those curious about charging Go disposables. But remember that you will void the warranty and take all safety risks with this method.
How To Charge A Vuse Go Vape?
Since the Vuse Go Reload and 3000, 5000 and 8000 share the same charging method, we’ll take the Vuse Go 3000 as an example for these 4 vapes.
#1 Clean Blockage In The Charging Port At The Bottom Of The Device

Before charging, check if there is clogging inside the charging port. Otherwise, it will block the current flowing through, leading to charging failure.
At the same time, water residue should be removed since it will malfunction the Vuse Go charger and device.
#2 Plug The USB-C Charger Into The Charging Port And The Power Supply

Then plug the USB-C Charger or Type-C phone charger into the charging port at the bottom of the device. And connect the other side of the charger to a power supply.
Note: The charging time may increase if using other chargers rated lower than 5VDC, 0.75A when charging Go 3000, 5000 and 8000.
#3 Switch On The Power And Monitor The Charging Signals

The power can now be activated to start charging.
While charging, these 4 devices all show solid white light. Wait approximately 90 minutes for the white light to disappear to indicate that charging is complete.
#4 Plug Out The USB-C Charger From the Charging Port And Power Supply

The recommended charging time for these 4 devices is 1.5 hours. When the white light disappears, you can disconnect the USB-C charger from the power supply and device.
When charging is done, activate them to feel if the vape flavour and vapour are denser than before. Here are 2 different methods to activate these devices.
| Collection | Activation Method |
|---|---|
| Go 3000 & 5000 & 8000 | Inhale Activation |
| Go Reload | Quickly press the button 5 times (LED flashing white once) |
How To Charge Vuse Without Charger?
For those curious about how to charge Vuse without a charger, here are 2 DIY charging guides for disposable vape and pod vape.
But remember, it is only a temporary solution before your charger replacement arrives. You are responsible for all safety risks while disassembling and charging the vapes.


Make a DIY charger by cutting the wire with scissors and separate the red and black (or red and blue) wires. Then, follow the steps below.
❗ Remember that the second method is only suited for pod vapes like ePod 2 but not rechargeable disposable vapes like Go 3000, 5000 and 8000.
🔋 1. Charging Disposable Vape (Taking Vuse Go 500 puffs as an example)
Use pliers to remove the bottom cap of the device and pick out the battery inside. Then, align the wires to the 2 battery poles.
Connect the DIY charger to a power supply and wait for 60 minutes to charge fully.
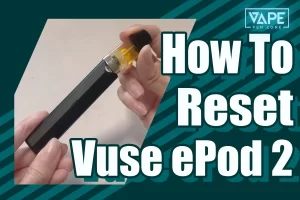
🔋 2. Charging Pod Vape (Taking Vuse ePod 2 as an example)
Find the charging port at the bottom of the vape device. Connect the red wire to the middle charging contact and the blue (or black) wire to the left.
Plug the charger into a power supply. Then, turn on the power and wait for 60-90 minutes.
Both of these methods have received favourable reviews from most Reddit users!
👉 Please refer to that article for more details: How To Charge Vuse Without Charger?
Vuse Go flashing Light
Here is all the guidance to Vuse Go flashing blue or white.
| Go Max | Go Reload | Go 3000 & 5000 & 8000 | |
|---|---|---|---|
| Flashing white light (5 times) | \ | Low battery | \ |
| Flashing white light (10 times) | \ | Depleted battery | Low battery |
| Flashing blue light | Depleted battery | \ | 1. Depleted battery 2. Insufficient e liquids NZ |
| Solid white light | \ | Charging | Charging |
| Disappeared white light | \ | Charging done | Charging done |
Verdict
Vuse Go how to charge? After reading this detailed guide, I believe you’ll better understand charging-related issues with the Vuse Go series! Why not fetch one to try it out? Surely you can succeed too!
For more Vuse-related guides or other vaping guides, please feel free to subscribe to VapePenZone NZ to learn more!
FAQ
Can You Charge Vuse Go?
This depends on the specific model of Vuse Go. You can charge the Vuse Go Reload, 3000, 5000 and 8000 for the Vuse Go.
How Long To Charge Vuse Go?
It takes about 90 minutes to fully charge the Vuse Go.
How Do I Know When My Vuse Go Is Fully Charged?
Charging is complete when the Vuse Go’s LED goes from a constant white light to a white light that disappears.
How To Charge Vuse Go Pro?
The Vuse Go Pro series comes with 4 rechargeable vapes, including Go Reload, Go 3000, 5000 and 8000.
The way to charge them is to plug the USB-C charger into the charging port and connect the other side of charger to a power supply.
Wait for 90 minutes, and you can enjoy your Go vape again.
Why Is Vuse Go Disposable Not Working?
1. Extreme temperatures beyond 0 – 35℃ trigger the auto shut-down functions, causing device malfunction
2. Self-disassembly to Go disposable vape may damage the battery and atomizer inside, leading to the device not working.
3. Clogging in the mouthpiece blocks the airflow in and out, leading to no vapour coming out. Thus, it misleads you that the device is not working.